

Making Herbal Remedies at Home
Making herbal remedies is the process of capturing a specific chemical essence of a plant or mushroom with a solvent (water, oil, vinegar, alcohol, honey, sugar etc.) and processing it to apply it to your body in some way.
These are usually used with the intention of supporting some kind of health process and are excellent ways of giving yourself the best chance of keeping well amidst the many stressors we all encounter daily.
The techniques are wonderfully simple with some basic principles under your belt, and there’s plenty of room for personal flair and creativity.
An important orientation is to appreciate that you’re likely to be working with whole plants, meaning they are complex and slightly different each time you encounter them because they are living organisms that have responded to the conditions where they grow. You will get to know your materials best by getting stuck in, experimenting and always keeping a good record of what you do and how it went and where you got your inspiration.
A Crash Course in Herbal Chemistry
Always ask these two questions when you embark on a new herbal medicine making project:
- Does the chemistry you want like oil or water?
- How big is the chemistry you want?
What do we mean by Chemistry?
‘Chemistry’ means the specific range of plant chemicals that you want your product to contain, compared to what you want left in the plant, e.g. aromatic ones, bitter ones, colourful ones etc.
1) Oil and water do not mix, and like follows like are the key principles underlying this first question. You need oily – technically known as nonpolar – solvents to extract oily substances, and watery – polar – solvents to extract other polar substances.
| Non-Polar/Oily | Polar/Watery |
| Oils
Alcohol |
Water
Vinegar Sugar Honey |
| Examples | Examples |
| Aromatic volatile oils from mint, resins from calendula and rosemary, curcumin from turmeric | Flavonoids that make the dark colours in berries and fruits, glycosides in many roots and mushrooms, minerals and water soluble vitamins from lush, juicy plants like nettle and cleavers, mucilages from marshmallow root which are so polar that in high percentage alcohol they will clump together in a tight ball |
The above table is a simplification of how you will usually use solvents, because so many things are mixtures; wine, for example, contains maybe 12% alcohol, a lot of water, lots of sugars, and a bit of acid.
2) Being aware of the size of certain classes of chemicals found in plants will inform how you handle plant material, and how long you leave the extraction process.
| Chemical & Examples | Size and Tonic Effect | Implication |
| Aromatic volatile oils
Lavender, mint, lemon balm, rosemary, thyme, eucalyptus, lemon verbena, pine, leylandii, pineapple weed, bay |
Very small
Aromatics are produced by plants to communicate with one another, with pollinators and with microbes, some of which cause disease. They’re a massively diverse group of chemicals, many of them with a mono- or diterpenoid structure, and they escape readily on steam. You know the feeling of inhaling a nice smelling cup of something, like lemon balm or mint or rose, and the “aaaah” that follows? That’s your nervous system responding to these aromatic chemicals. In general, most aromatics are tonic to the nervous system, and are therefore excellent for bouncing back from a stressful day, managing tiredness and working with digestive upset. |
Imagine walking through a patch of rosemary on a scorching day. What can you smell? Just the presence of sun on a plant high in aromatic volatile oils is enough to make those oils evaporate. So you need to be careful to retain those oils during your extraction and making processes.
Steam distillations and infusions are the best ways to extract these in water, while alcohol, vinegar, sugars and oils will also work well in general. |
| Pigments such as poanthocyanidins or beta carotenes
Bilberry, raspberry, blackberry, sea buckthorn berry, St John’s Wort (oil for external use only – do not take internally without professional supervision), yellow dock root, cramp bark (guelder rose), elderberry |
Medium
When you hear “eat the rainbow”, believe it. Brightly coloured plants essentially provide your body with a buffer against stressors of all kinds, at a cellular level. Some of them form precursors to vitamins, others help maintain healthy blood vessels – think of coloured pigments as the grease in the wheels. Nothing goes right without enough of these. |
Being bigger, these chemicals take slightly longer to move from the plant to the solvent, just as the colour of your tea will deepen as the minutes go by. If you’re extracting St John’s Wort into oil, it can take weeks for the oil to turn the desired red colour. For tougher fibres like cramp bark, applying more heat by decocting will ensure you see the colour of the water turn deep red. |
| Sugars and mucilage
Marshmallow root and leaves, chickweed, liquorice root, cinnamon bark |
Medium to large
These are like plant syrups. They feel slimy in the mouth and they coat the surfaces they come into contact with. This is useful for digestive irritation and for nourishing tissues that are dry and worn out. |
Many of these chemicals are best extracted by infusing overnight in cold water. Hot water cooks the relatively delicate mucilage, which can make it less digestible and threaten it’s coating properties. Some of them can be very long, so giving them enough time to come out is key.
It’s essential to give them a watery solvent to extract into – as noted above, the sugars will literally clump together if faced with oily, nonpolar solvents and you won’t get anything of use out except a good chemistry experiment for kids. |
| Tannins
Any leaf that tastes drying; yarrow, raspberry leaf, blackberry leaf, wood avens, dock leaves. These chemicals are what make your black or green tea a bit drying and bitter |
Mostly large
The diverse range of chemicals known as tannins tend to maintain the integrity of the tissues, stopping too much moisture forming in the body which can lead to inflammation, aches and pains. Too many can dry the gut up too much that absorbing essential things like iron becomes difficult. The key to tonics is having the right amount. |
If you want the archetypal tannin experience, you could nibble a little bit of an oak leaf, spitting it out when it gets unpleasant. Oak is super high in tannins, which were used to tan leather. If you ate enough oak, it would tan your insides. Tannins usually occur in plants in lower quantities, enough to be pleasant, like in green and black tea, rosebay willowherb and yarrow. Experiment with your teas, because tannins tend to be extracted by water, and decide how long you like to let them steep based on your taste preferences. The longer you leave it, the more tannin rich it will be. This can be useful for skin washes if the condition is hot and weeping. |
Water Extracts
Water, rightly used, is one of the best allies in maintaining good health. Drink lots of it, flavoured with plants if you like. Bathe in it, remembering that soap is a relatively modern cultural artefact that can actually disrupt microbial communities and the protective oil layer that is in fact the first layer of your immune system. If your skin reacts to soap, consider just not using it for a while. You can use plant teas as rinses, and combined with running your skin with a flannel or soft body brush, cleans very, very well.
Infusions
Infusions are water extractions carried out by pouring freshly boiled water over plant material and letting it steep for 10-30 minutes. Always put a lid on, even if it’s not a smelly plant. There are nonaromatic volatile chemicals that it is best to keep in the cup. A rule of thumb for drinking infusions is to use 1 tsp/pinch of plant material per cup water, or 1 Tbsp/big pinch of plant per normal teapot. For cooking, bathing, and making cosmetics, you’ll probably want stronger infusions. If working with dried herbs, you can work out a weight to volume ratio that works for you. Document what you do!
Infusions are suitable for soft material like flowers, leaves and some fruits.
Decoctions
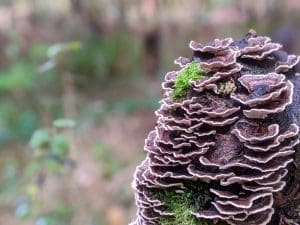
Decoctions are the big brother of infusions, requiring simmering of the water and plant material together for anything from 10 mins – 8 hours. The same amounts apply in general, but may need tweaking. Always use a lid, and make sure they don’t boil dry. Slow cookers work wonderfully. They are suitable for harder materials like barks, seeds, roots and mushrooms.
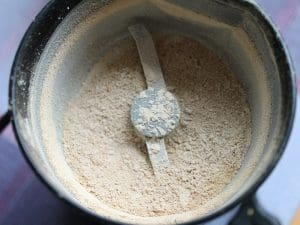
Once you have a decoction, you can strain the plant material out and reduce the liquid down to a syrup consistency, or even to the point of a powder, which you can then use as a concentrate. These can be extremely concentrated and are energy-intensive, and are usually what you encounter if you buy a standardised herbal extract in pill form.
Special hack: The thermos flask is your best friend. They make what we call ‘deep infusions’. I love making a whole 1-2 litre flask of tea to last the day, or to wake up to on cold winter mornings. Ginger, liquorice, lime blossom (this goes red after deep Infusion!), hibiscus, cinnamon, rosemary, and anything else that doesn’t get too bitter over many hours is delicious prepared in this way. Plus it means you don’t have to reboil the kettle each time you fancy a tea. Get a stainless steel one because the glass ones are liable to shatter.

Aromatic waters are magical things to make.
Think rosewater – here you’re getting the very smallest aromatic chemicals and none of the larger ones.
The process uses steam and is more fiddly than infusing and decocting, but well worth it. If you have a still, use that, otherwise, a saucepan will do just fine.
- Place your plant material in the bottom with water just covering it (this uses a lot of plant material, be generous as you don’t want the pot to boil dry and you do want a potent aroma) and turn on a gentle heat.
- Place a heatproof ramekin upside down at the bottom of the pan and on top stand a heatproof bowl or jug. This vessel should not collect water from the bottom as this is where the final product will collect.
- Place the lid on upside down, creating a pathway for water to drip from the lid and into the heatproof vessel in the middle. Place ice cubes or cold water in the bowl of the lid to create a place for the aromatic steam to condense, ensuring none gets into the vessel inside. You’ll need to change this at intervals to keep it cold enough to continually condense the steam.
Aromatic waters taste very different to infusions or decoctions of the same plant, and you’ll often see glistening pools of essential oil floating on top. Essential oils can aggravate kidney diseases, so be wary, and not all plants should be prepared in this way due to potential toxicity.
Research the herb you use well. These are excellent additions to cooking, bathing waters and the water fraction of creams and lotions. Store in the fridge for as long as they smell fresh, typically around 6 months.

Oil Extracts
These require a water bath so that the oil is not damaged by heat.
I use a heatproof glass bowl or jug in a pan of gently simmering water, as much oil as will cover the plant, and never put a lid on to avoid condensation. 3 hours is a good amount of time to leave it simmering, particularly for fresh leaves and flowers. Dried plant material can be steeped in oil for days or even weeks. A traditional exception to this is St John’s Wort oil, prepared by macerating (steeping) fresh aerial parts in oil for 40 days in full sunlight. The result is a brilliant red oil for use in wound balms and creams, which will not cause photosensitivity due to already being exposed to sunlight.
What’s important is to minimise available water, as this will cause rot and spoilage, by wilting fresh plant material slightly before maceration (about 80% of plant weight is water). Keep plant material submerged as much as possible, and strain it through a fine sieve or muslin to avoid particles that will spoil.
With your oils, you can make a whole host of delightful preparations.
Dissolve beeswax or carnauba wax into it for a simple balm or ointment (about 1 part wax to 6 parts oil, but experiment for the desired firmness),
Dissolve cocoa butter and pour into moulds for pessaries and suppositories (about 1:4), use them as the oil fractions of a cream or lotion,
or use them as is, maybe with a few drops of essential oil, for a skin and hair tonic.
You can use these oils in food as well as herbally
You can also prepare culinary oils in this way for use in vinaigrettes, marinades, sauces and pestos. These are a great, low maintenance way of having tonic plants available on a daily basis.

Syrups, Honey and Candies
An awesome syrup preparation is to dice an onion, place it all in a jar and pour in white sugar. The sugar will absorb the moisture and become a syrup relatively quickly, making a great winter tonic to keep colds at bay.
Honey lends itself wonderfully to infusing, particularly with drier, aromatic herbs like thyme, lavender, rosemary and barks, seeds and dried roots. Fresh roots like dandelion, elecampane, liquorice and ginger make delicious cough sweets and tonic toppings for cereal or desserts.
To make true syrups, I use a strong infusion or decoction to dissolve sugar at a ratio of 2 parts sugar to 3 parts liquid, by weight. Thick, gloopy preparations are great for coating inflamed throats, increasing the contact time between the remedy and the tissues.

Vinegar
Herbal vinegars are some of my favourite preparations to reach for in cooking and drinks.
Simply pack your plant into a jar and cover with vinegar, leaving it to macerate for up to a week.
I actually like using Willys ACV as it’s still live.
https://www.willysacv.com/

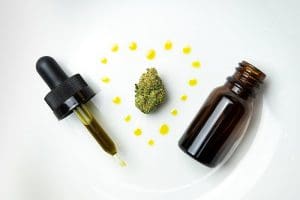
Alcohol
The herbal tincture is becoming better known due to its convenience. It involves macerating a plant in alcohol – vodka is a good catch-all at around 40% ABV – for up to 4 weeks.
You can use any alcohol you like; brandy, wine, gin, etc. to expand your botanical cocktail repertoire, too.
I hope you’ve now got some fundamental principles in mind to start making your own herbal tonics. They make great gifts, support health and wellbeing, and are fun to make. Plus, the tonic effect starts as soon as you walk out the door and start walking. There is a wealth of good resources out there for more detail – a few of my favourites are below. Enjoy!
The Handmade Apothecary – Kim Walker & Vicky Chown
The Herbal Book of Making and Taking – Christopher Hedley and Non Shaw
The Herbal Tutor – Anne McIntyre
3 replies on “How to Make Herbal Remedies at Home”
Leave a Reply
You must be logged in to post a comment.
What a wonderful overview. Thank you
I did a bit more research, and, contrary to your article, alcohol is described on all other sites I found as being polar (for example https://techiescientist.com/is-ethanol-polar-or-nonpolar/).
Thanks for bringing that to light Thomas, it’s supposed to be sat in the polar section as a watery none oily substance. I’ll move it over straight away. Again thanks for letting us know so we can ammend it 🙂