


Through this piece we’re going to look at the process of how to get Birch sap out of a Silver Birch tree, before making it into Birch sap syrup. It’ s one of the most exciting and interesting ingredients we have the opportunity to forage throughout the year.
Let’s look at How to Make Birch Sap Syrup with our Video Guide
Birch Sap Syrup
Making Birch sap syrup is one of the first things I do with wild food every year – it tells me we’re about to shoot straight into the more serious collection of wild foods and is, at the moment, my only source of wild sugar to be used throughout the coming year.
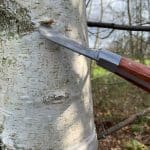
The sap rises throughout March and can vary from year to year, but each area usually has a 2-3 week window to do this process, the easiest way to check if the sap is flowing is to stick a knife in the tree trunk at an upward angle – if sap leaks down the knife then you’re good to go.

Click here for our Silver Birch Identification Guide
Recipe to make 500ml Birch Sap Syrup:
Our preferred equipment for extracting birch sap from the tree:
- Plastic tubing – 1cm in diameter and 40cm in length
- A drill, any will work manual or electric
- 1cm wide drill bit
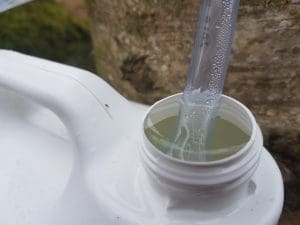
- Container for collecting the sap – I use a 5ltr water bottle
- Piece of muslin cloth – big enough to cover the hole of your container
- A range of elastic bands or string
Method:
- After checking the tree is flowing, about 1m up from the base of the tree, use your drill and drill bit to make a 1cm width hole 8cm into the tree
- Push your piping into this hole, making sure it’s at least 2cm in and secure
- Secure your container at the base of the tree – either tie it to the tree, make sure it’s on flat ground or secure it by leaning rocks against the sides.
- Secure the cloth around the top of the container, either using elastic bands or string. This is to stop insects and dirt finding their way in!
- Pop a hole in the middle of your cloth and feed the tubing through it so the liquid will drip into your container
- Leave it overnight to fill up
- Return to find your 5ltr container full of beautiful sap, remove everything and pop the lid on your container so you can easily carry it away.
- If you want to plug the hole, take a fresh branch off the same tree, the same thickness as the original hole (1cm in diameter). Sharpen the end, remove your tubing from the tree and hammer this branch bung into the hole to bung up the tree. Opinion is divided as to whether its better to do this or just let the hole heal itself.
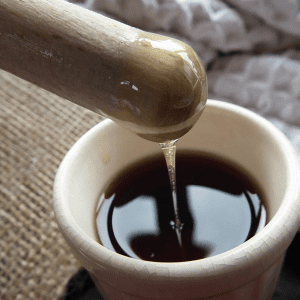
- Take your sap home and boil it down until it thickens and turns into syrup – up to 95% of the liquid must be boiled away so this can take a full day of boiling down. When it begins to thicken it needs constant stirring to ensure the sugars don’t burn. Alternatively, it can be put in a plastic bowl and in the microwave, opening the microwave door every minute to release the steam (I find it’s less likely to burn this way)
- When it’s reached a consistency you are happy with, bottle it into sterilised bottles or jars and enjoy.
Okay – now I have the syrup what else can I do with it?
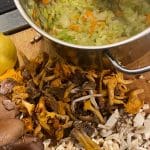
Here are a few more delicious recipes involving Birch syrup:
Birch syrup BBQ marinade with Mugwort
Birch sap Sticky toffee pudding
Happy Tapping & Happy Foraging 🙂
Find more amazing Wild Food recipes here: